Grandfather’s Desk: A Vignette

I have started a re-decorating frenzy at my house. Or perhaps just a decorating frenzy, since I didn’t do such a hot job of decorating the first time around.

I am only decorating with items that personally mean something to us. We’ve collected a household of the oddest items, and some of them are not necessary at all. So, if something is chosen to stay in this house, it is of some importance. I don’t buy or make decor items for the sake of having decor.

I also like to spend as little as possible and do most of my decorating by “shopping the house.”

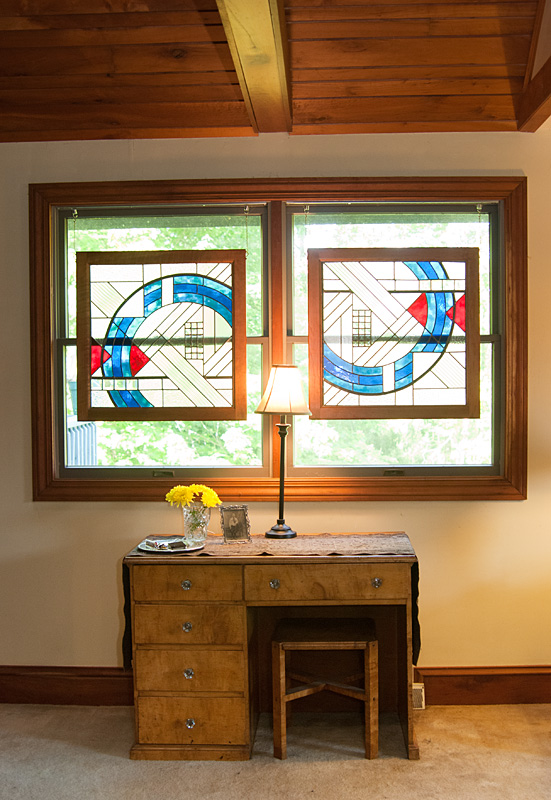
I’m redoing the living area little by little. Here is a weird little spot in my living room that I’ve never quite known what to do with. Sometimes I have this desk in front of it, sometimes I have 2 easy chairs with a table between them, which has always been a little cramped, especially since there was a piano to the left of this window, encroaching on its personal space. The piano was moved several days ago as part of the re-do.

My home has a vaulted ceiling and beams that are cherry-clad and the baseboards are also cherry. We love natural wood, so you’re not going to find me painting very much furniture. In fact, I’m more likely to be found stripping paint from furniture.

The desk & stool are of figured maple and were hand-made by Mr. Crazy’s paternal grandfather, Karl. Not sure of the date. We plan on ordering a piece of glass for the top. There used to be glass on it, but that was before we owned it. Mr. Crazy’s father passed this on to us about 5 years ago.


The stained glass pieces were made by me about 10 years ago. At one point I had a stained glass studio. These pieces were made for an art show and were of my own design. I had never done anything abstract and was going for an “art-deco” look. The cherry frames were made by Mr. Crazy.

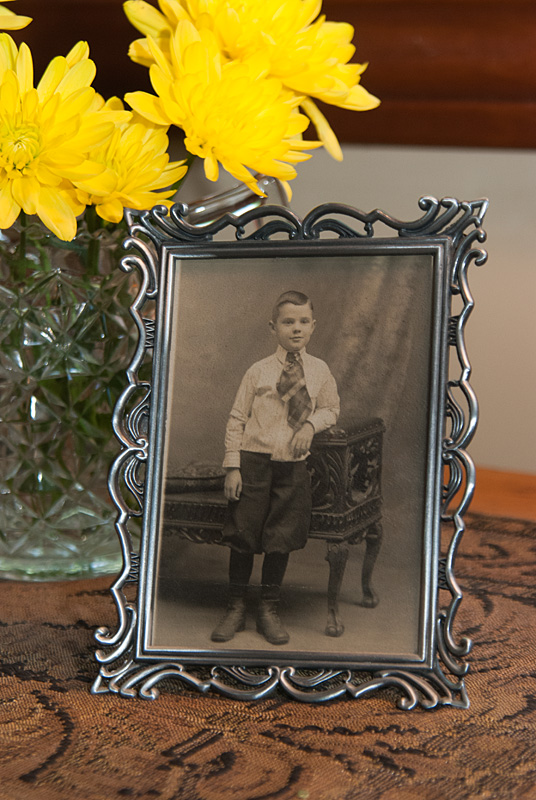
This is a photo of my maternal grandfather, Francis, c 1910 or so. Frame from the Dollar Tree.

I’m a sucker for glass and silver metal stuff, so when I was offered some items that had belonged to my mother-in-law (who passed away this past fall), I chose the cut glass mini-pitcher/vase and the metal tray. The vase currently holds some flowers from the anniversary bouquet Mr. Crazy brought me the other day.


I have this terrible ADD habit of just dropping my keys wherever they land when I come in the house. I am constantly looking for my keys when it is time to go somewhere. I don’t usually carry a purse and the keys get shoved in a pocket when I’m out. So, I have put a special tray in the kitchen and one right here and I’m trying to train myself to lay the keys in the trays so I can find them later. I just love all the designs on it.

It is working. Today.


The above photo was just for looks. Here is how the tray usually looks. It also serves as a charging station for the cell phone, because I do the same thing with the cell phone as I do with the keys. Go figure.

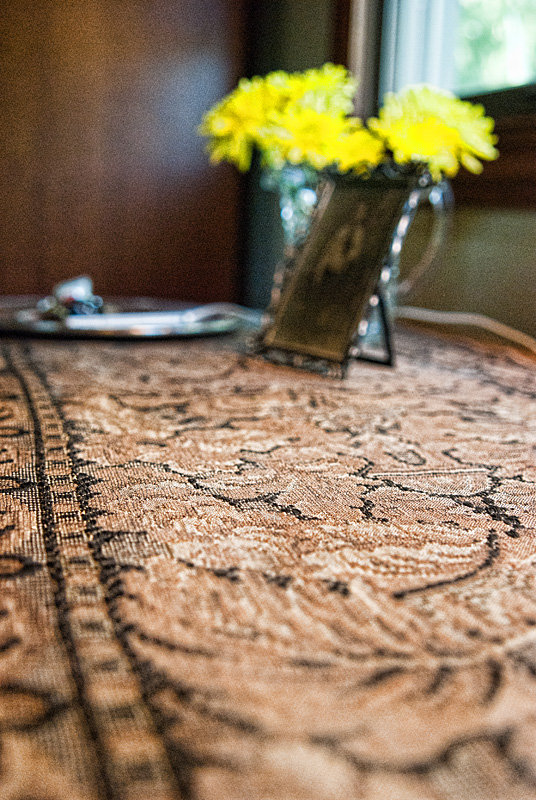
The scarf that is on top of the desk was given to me by Mr. Crazy’s mother. She said it was on the piano in the house she grew up in as long as she could remember back. Which makes it at least 80 years old. I had it on our piano until just the other day.

Thanks for looking!

Christine

I am sharing with:

Funky Junk's Saturday Nite Special

CraftoManiac Monday

Displaying Random Weird Stuff that you can’t throw away…

So, I’ve been sorting through some “stuff” and I’m determined that any item in our home will either be displayed or will be gotten rid of. No more storing of “stuff” in totes. Dang, Rubbermaid made a fortune off of me.

Anyway.

We’ve been schlepping around this collection of items that belonged to my husband’s great grandmother: The bottom to churning stick thing, a butter paddle, a candle snuffer and a thingy-ma-bob for darning socks. I am not a consultant for technical terms. Deal with it.

An advance apology – these are all cell phone pics. If I had to drag out the real camera, take staged photos, retouch and apply watermarks – this post would not get written. Also because these are all photos from my brand new iPhone that was about 1 hour old when I took these, and I’m not quite happy with the quality, but it is what it is. I’ll post better ones later. Maybe.

I was going to use a crate that I had purchased from some craft store awhile back, but it looked so new and needed some kind of treatment done to it, so I’d been putting this project off.

Then, last week, while cleaning out the garage, I was organizing Mr. Crazy’s bee-keeping equipment and I decided to steal this. I don’t know the official name of it, but it’s used in hive construction/assembly.

Looks like a crate to me!

First I had to brush the heck out of it because it was kind of grimy from being in the garage. That’s all I did to it. I’m in minimalistic expenditure phase when it comes to energy, time, resources and money right now.

Then, I took some copper wire that I had (you could use florist wire, but I couldn’t find mine) and wrapped it around each item and secured it in the back by twisting it with my pliers. Then I trimmed it and smashed it down a little to make it look better:

And here is the completed project :

I purposely mounted the items higher up on the bee crate thing because I intended on this being displayed above my kitchen cabinets and I knew the lower part would not be visible.

Here is the crate displayed in the same area as a spinning wheel and some kind of wool yarn winder that belonged to the same great grandmother:

And while waiting for it to be time to link – I was doing some more rearranging and found this sign that an artist friend (now deceased) had made for Mr. Crazy back when he was selling honey at a little fair. I think it’s perfect!


Mr. Crazy has informed me that this is a fruit crate. Even though it was the same exact size and shape of the other wooden items with the bee keeping equipment, it was not bee equipment and had nothing at all to do with bee keeping. I’m all for pretending he didn’t tell me that.

Thanks for looking.

Christine

Funky Junk's Saturday Nite Special

Carved Celtic Knotwork

I married Mr. Crazy in 1997. In doing so, I married a woodcarver who came from a long line of woodcarvers. So, there was little to do, but try my hand at woodcarving. Below is the very first (and last) project I carved. Of course, being the over-achiever that I am – I designed a Celtic Knotwork Pattern to carve. Yep, it was hard, and it’s not perfect, but I did it all myself.

Unfortunately, I carved this about 10 years ago and it’s just been hanging around in an unfinished state.

So, I did some final sanding on it and stained it:

Then, I hung it and a Scottish Thistle carved by Mr. Crazy’s uncle Clarence (I told you it runs in the family!) and hung them over the nasty screw holes that were left when taking down the kitchen cabinet above the peninsula/bar:

OOPS! Not a good job of dusting the thistle or hiding the fact that we haven’t installed the new outlet covers.

Let’s try that again:

There, that’s better!

And what’s even better is – I didn’t spend a cent for this. I had the sanding sponge and I had the stain. FREE ART!!

I’m not crazy about the spacing of these 2 plaques, but due to the placement of the screw holes, this is where they had to be. I’ll be adding another piece between them to balance it out. Later.

PS – If you pay attention to tags, you will find “Irish Decor” on this one and a lot more to follow. Between Mr. Crazy and I, we have Irish, Scottish and English blood coursing through our veins, so Celtic music and art are a huge part of our lives. Stay tuned for much more decor in this vein as we turn our dining room into an Irish Pub.

My 1st Pinterest Project OR The Importance of Following Instructions

I lost my Pinterest virginity yesterday. 😉

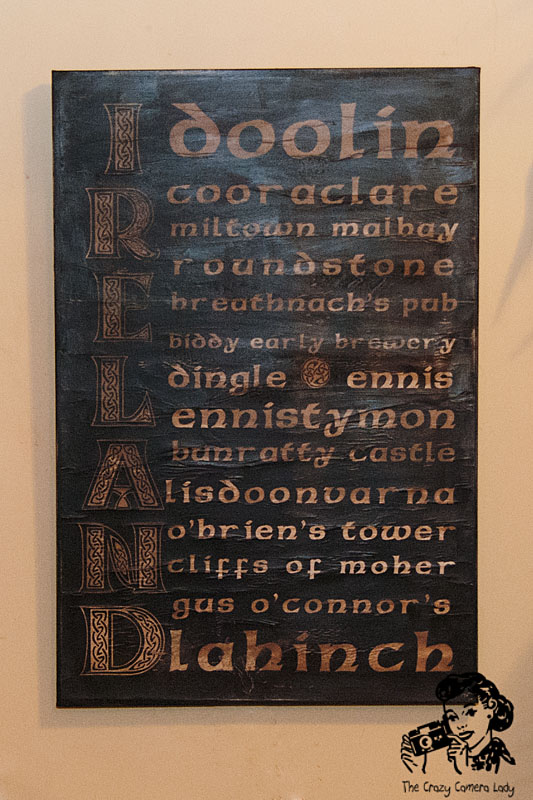
I tried my very first Pinterest project, subway art. I did mine a little different – I listed all the towns that Mr. Crazy and I visited when we traveled to Ireland many moons ago, but along one side, I also put “Ireland.” I designed the file at 24″ x 36″ because that is the size canvas that I had. I sent the file over the internet to my local Staples and ordered an engineering print for $1.99.

5 minutes later, I discovered I had misspelled one of the town names, so I corrected the file and resent it and this time ordered TWO copies, for an additional $3.98

Total spent so far: $5.97

STEP 1:

I started off my painting a used 24×36 canvas with flat black Valspar (Lowe’s 97 cents, total so far: $6.94). The canvas is an old sample from my studio that I no longer wished to display. I’m not showing a “before” shot of the canvas because I don’t want to hurt any of my clients’ feelings because I painted over their faces. I’m counting the canvas as free since it was a repurposed item.

STEP 2: Trim the print. OK – I have to admit – I started getting ticked off right here because I ordered a 24×36 print, but when I looked at it, there was a white border around it. WITH the border, it was 24×36, which means that the file I sent them was reduced slightly. Next time I will order the print a size larger so that this doesn’t happen.

STEP 3: Adhere print to canvas with Mod Podge. (Matte Mod Podge for Paper, $6.99 – new total: $13.93, paint brush already on hand).

Hmmmm. I don’t really like the stark contrast between the black and white. What to do?

STEP 4: Darken Print

I read where someone used coffee to darken their letters. Tried it, not dark enough. Rustled around the kitchen for something darkish and found some “Liquid Smoke”. Tried it in small area and all it did was make the canvas smell like supper.

So, I broke out a can of Minwax stain that I had picked up for some other project (not done yet) for $3.97, making the new total $17.90. I wiped it on with a paper towel and immediately wiped it off with another paper towel.

Hmmm. I’m not so sure I like this. It’s looking a little too dark. At this point I’m not so sure if I’m going to like this when I get done.

STEP 5: Distress – I used my sanding sponge to add some distressing along the edges and on top of some of the wrinkles.

STEP 6: Seal

Oh, dear – this has gone on SO thick this time. And you can see the brush strokes like crazy and it’s starting to wrinkle up a LOT. I realize that perhaps the stain (which seemed oily) was interfering with the Mod Podge. Or perhaps I shouldn’t have used Mod Podge for the sealer. Or perhaps I should have used a foam brush. I’m really freaking out at this point and even tried to peel up the print from the canvas in order to start over with the backup print, but the print was firmly adhered and tore where I tried to pry it up. Nothing to do but move forward.

AFTER:

The next day I put the hanging hardware on it and hung it in the dining room, which is in the process of being turned into an Irish Pub theme.

Honestly – I don’t care for it:

1. The Mod Podge is matte, but it is still reflecting light like crazy.

2. The right hand side of the print is not as dark as the left side. All 3 copies were like this. The Staples girl explained that these were supposed to be more like blueprints and stuff, not something with large areas of black, so the printing quality wasn’t going to be like I wanted it. I should have touched it up with a marker or something beforehand, but I was afraid of making the fix WAY noticeable.

3. The wrinkles – UGH

4. Lettering too dark

5. Print smaller than 24×36 – I don’t like how it doesn’t go out to the edges.

6. Not sure that putting “Ireland” down the side was a bright idea. The last line looks especially funky – the D is way too close to Lahinch.

SO – since this was my first project, I should have done more research. I read 2 sets of instructions for this project and kind of melded the two together and it didn’t work out all that well. I will probably redo the project at some point, but for now – here it is:

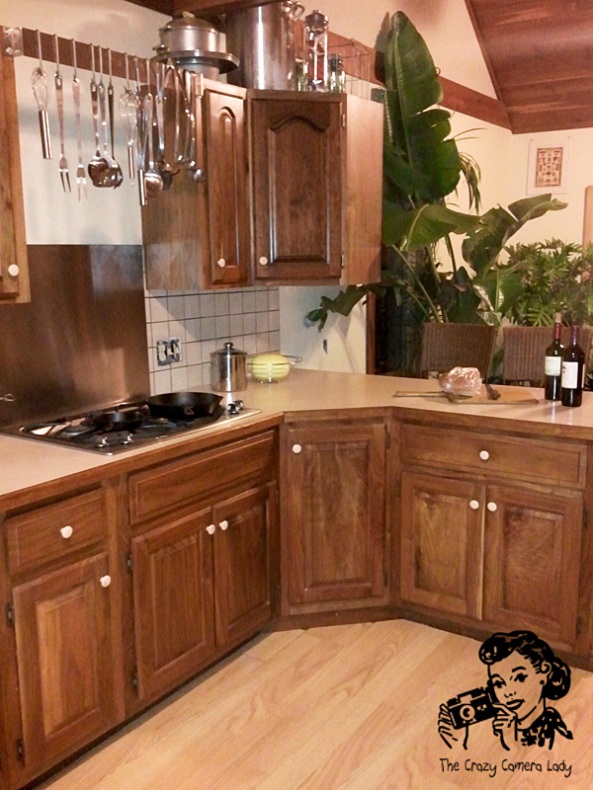
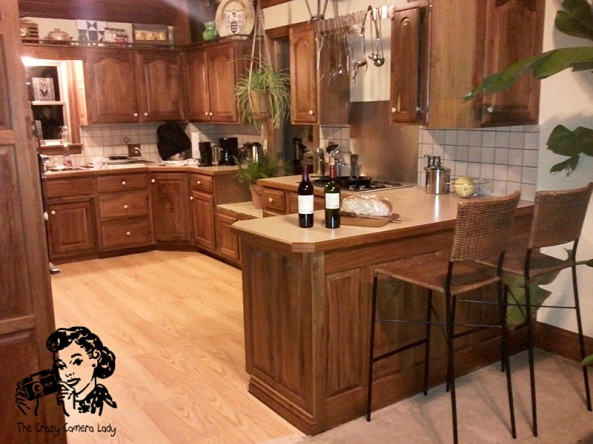
Kitchen: Christmas 2011 Revamp

Here’s some photos of some kitchen work that I did as a Christmas present to my hubby. He is the chef of the family.

I don’t have “before” photos. Well, I do from when we first moved into the house, but they’re from my film days, so I’ll need to scan some photos. As soon as I find them. 😉

There were 3 major components to this job:

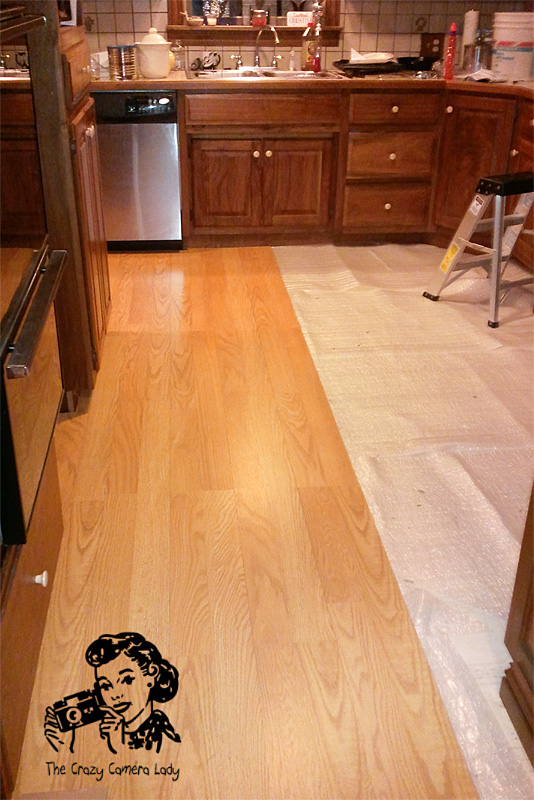
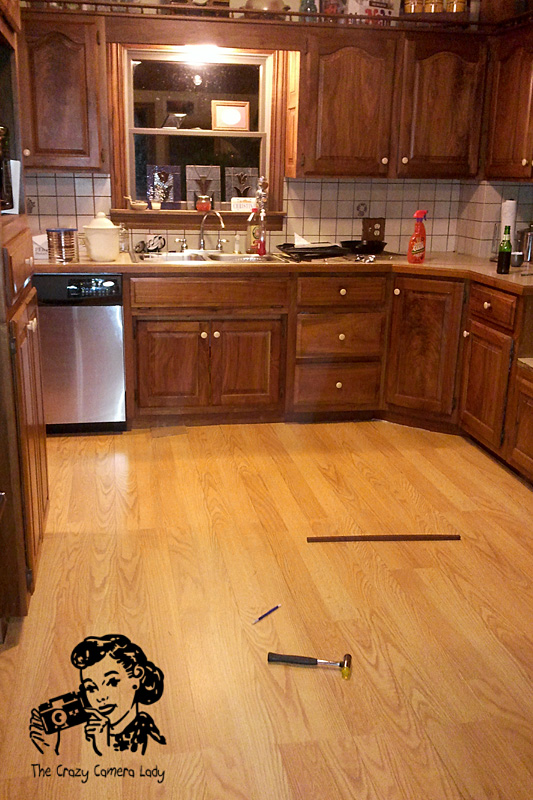
  1. Installation of laminate flooring
  2. removal of cabinet above stove & cabinet above peninsula
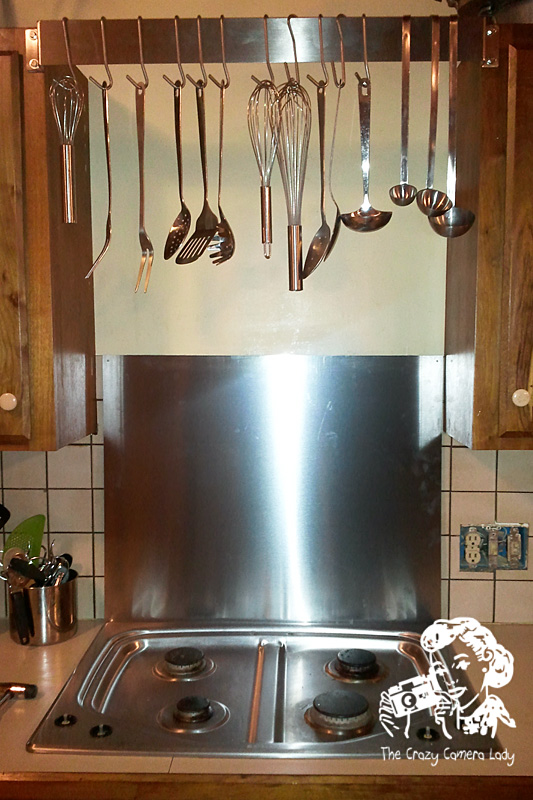
  3. installation of pot rack above stove & stainless backsplash

Funny story….I started this work as soon as my hubby left for work in the morning and hoped to have it done by the time he got home at 4PM. The cabinets came down quite quickly, but the floor was hard to get started, PLUS, since this was a surprise, I didn’t ask DH to pull out any tools for me, so when it came time to find the right saws, etc for this job, we (DHs best friend helped) were at a bit of a disadvantage. We assumed DH owned the proper tools, he did not and we had to experiment for awhile until we found something that worked. Next time I’ll get a jigsaw first.

DH wound up picking up fast food for us on his way home from work and then pitching in to help. His buddy left about supper time and DH and I continued working until just past midnight.

IN PROGRESS Floor photos:

Halfway done with the floor at 9:40 pm

Floor finished at 12:11 AM whew!

AFTER photos, sort of – these were all cell phone shots – I know – BAAAADDDD!!!

Stainless steel backsplash & new pot rack for utensils

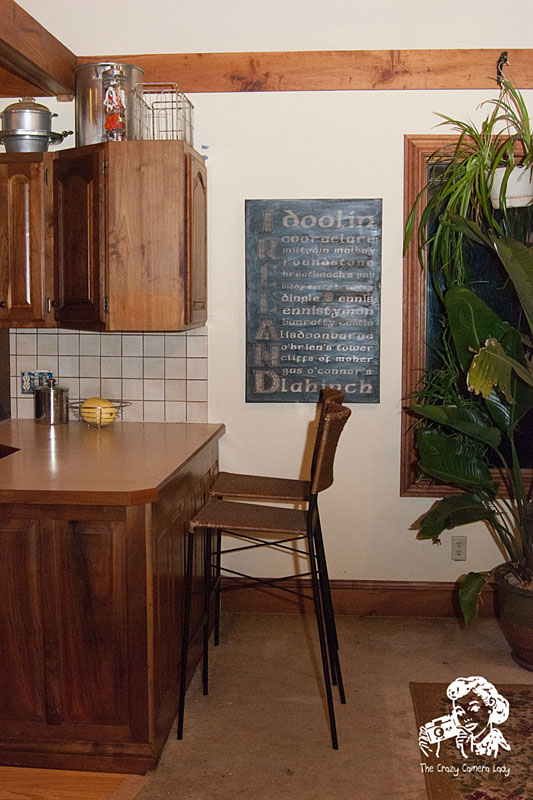
View from the dining room. We still have some additional work to do. We’re going to add on a real bar with an overhang and then get bar stools that are the right height for it. These will do for now. I already had them on hand. I also already changed out the cabinet hardware, but haven’t taken photos.

And it’s real obvious that I have not yet learned how to stage photos. (I’m a people photographer, they don’t need staged. Much. 😉 )

Initial Bedroom Refresh

OK, so this turned more into a before and after of my bedroom that just looks like I cleaned it. Whatever.

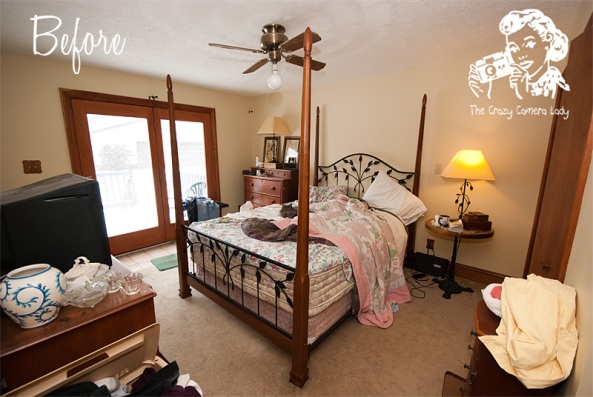
Here’s the lovely BEFORE:

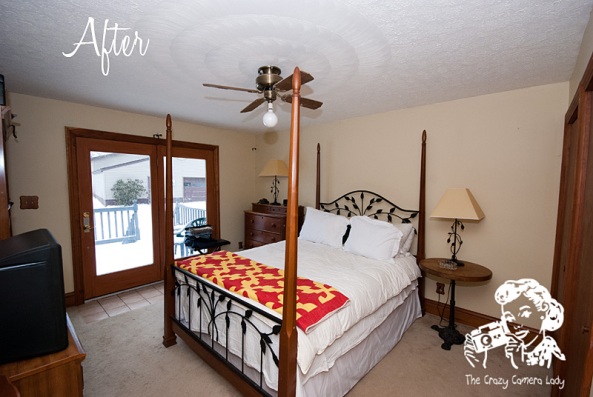
Here’s the changes I made:

  • Removed the cat from the bed
  • Removed non-fitting, not matching bedding & exchanged for something easier on the eyes
  • Removed small dresser (with TV on it) and replaced with storage wall unit from living room.

Changes still needing done:

  • Bedding needs revamped. Full/Queen down comforter does not really fit a Queen sized bed
  • 2 lamps will be replaced by 2 wall reading lights above the bed (ordered from Ikea – woohoo!)
  • Drapery hardware above doors needs removed – not sure if I’m putting up new curtains.
  • Bedside table needs sanded and treated with tung oil
  • wall storage unit needs final organization, hence their non-appearance in the photos
  • art for above the bed & other areas of the room
  • rug for tile area by door
  • paint the walls – this is one of the few rooms that can be painted a different color. Most of the house is “open concept” and is painted one color.

The AFTER photo:

Before we start – here’s the plan:

Here’s the deal:

For 7 years we’ve lived in this house and I basically painted the whole place one color when we moved in, arranged the furniture, slapped a few pieces of art on the wall and called it done.

Yeah, well, that’s not working for me, any more. I used to not care. It was neat and clean and that was good enough. But now, Pinterest has enlightened me to what my home could look like if I actually gave a crap about it. I’ve been touring many blogs on home decorating during the last few weeks and I’m ready to start.

So – the first round for each area will be to stage it as well as I can without buying anything new – sort of an attempt to put the basics together.

Like right now I’m lounging on my bed with the laptop. My bed is piled with a cream colored velvelteen throw, a hunter green comforter and a mostly pink quilt. Hey, they’re warm, they’re blankets – good enough.

Well, that’s how I’ve been looking at things. But in all actuality, I have a perfectly lovely white down comforter and a red and yellow quilt made by my husbands grandmother that I’d like to feature on the bed. But are they on it? No…..

Because I’m sort of lazy like that.

So, anyway – I’m going to start today with the master bedroom. Actually, it’s the only bedroom, but whatever. It’s Friday the 13th and it’s snowing for the first time where I live, so this is a good day to stay cozy in the house and get some work done. Wouldn’t want to tempt those Friday the 13th crazies….

Hang on – I’m going in!

The Bucket List

I have many ideas swirling around in my head, but let’s be realistic – by the time I get to that project, I will have changed my mind 37 times, so let’s just limit the home improvement project bucket list to general areas & rooms that I would like to re-do during the course of this blog.

As the projects are completed, I will link to the appropriate post(s):

Bucket List:

  1. Finish Kitchen project. Started this on December 23 as a Christmas present for the hubby and some minor finishing needs done.
  2. Dining Room – the current plans are to turn this into an Irish/Celtic pub.
  3. Hallway
  4. Living Room
  5. Bedroom
  6. main bathroom
  7. studio
  8. front porch
  9. deck
  10. back deck
  11. hot tub area
  12. office
  13. client bathroom
  14. basement bathroom
  15. laundry room
  16. music room
  17. utility room
  18. main basement area
  19. upstairs hallway

Hmm….now that it’s all laid out like this – it will probably take YEARS to get this house the way I want it. *sigh*

Welcome, hello, whatever.

Thanks to the existence of Pinterest and the vastness of internet resources, I have caught the bug. I have done more home decor projects in the last 2 weeks than I have in the last 2 years. I’ve also followed a couple of new recipes. I don’t even cook, so that’s saying a lot.

The blog is for me to explore my creative side. There’s more to me than just being a photographer, and I’m itching to explore…